Building a budget gaming PC can be an exciting and rewarding experience. Not only can it save you money compared to buying a pre-built system, but it also allows you to customize your build to meet your specific gaming needs. Below are the essential steps to build a budget gaming PC.
Step 1: Define Your Budget
The first step in building a budget gaming PC is to determine how much you are willing to spend. Your budget will influence the choice of components, so it’s important to decide on a figure that suits your financial situation.
| Component | Approximate Cost (USD) |
|---|---|
| CPU | $100-$200 |
| GPU | $150-$300 |
| Motherboard | $50-$150 |
| RAM | $40-$100 |
| Storage (SSD) | $50-$100 |
| Power Supply | $30-$80 |
| Case | $30-$100 |
Step 2: Select the Right Components
2.1. Central Processing Unit (CPU)
The CPU is one of the most critical components. For a budget build, consider CPUs like the AMD Ryzen 5 3600 or the Intel Core i5-10400. These processors offer good performance without being overly expensive.
2.2. Graphics Processing Unit (GPU)
The GPU determines the quality of your gaming experience. Budget-friendly options include the NVIDIA GTX 1650 Super or the AMD Radeon RX 570. Make sure to check the latest benchmarks and reviews to make an informed decision.
2.3. Motherboard
Your choice of motherboard will depend on the CPU you select. Look for a motherboard that supports your CPU and has the necessary ports and features for future upgrades. Affordable options include the B450 (for AMD) or the B460 (for Intel) chipsets.
2.4. Memory (RAM)
For most gaming needs, 8GB of RAM is sufficient, but 16GB is recommended for better performance. Brands like Corsair or G.Skill offer reliable and affordable options.
2.5. Storage
An SSD is crucial for faster load times. A 250GB to 500GB SSD from brands like Samsung or Crucial will be efficient. You can always add more storage in the future.
2.6. Power Supply Unit (PSU)
A good PSU is essential for system stability. Aim for at least a 500W unit from reputable brands like Corsair or EVGA. Look for 80 Plus certification for efficiency.
2.7. Case
Your PC case should provide good airflow and enough space for all your components. Ensure it fits your motherboard form factor (ATX, micro-ATX). Cases from brands like NZXT or Cooler Master are reliable and affordable.
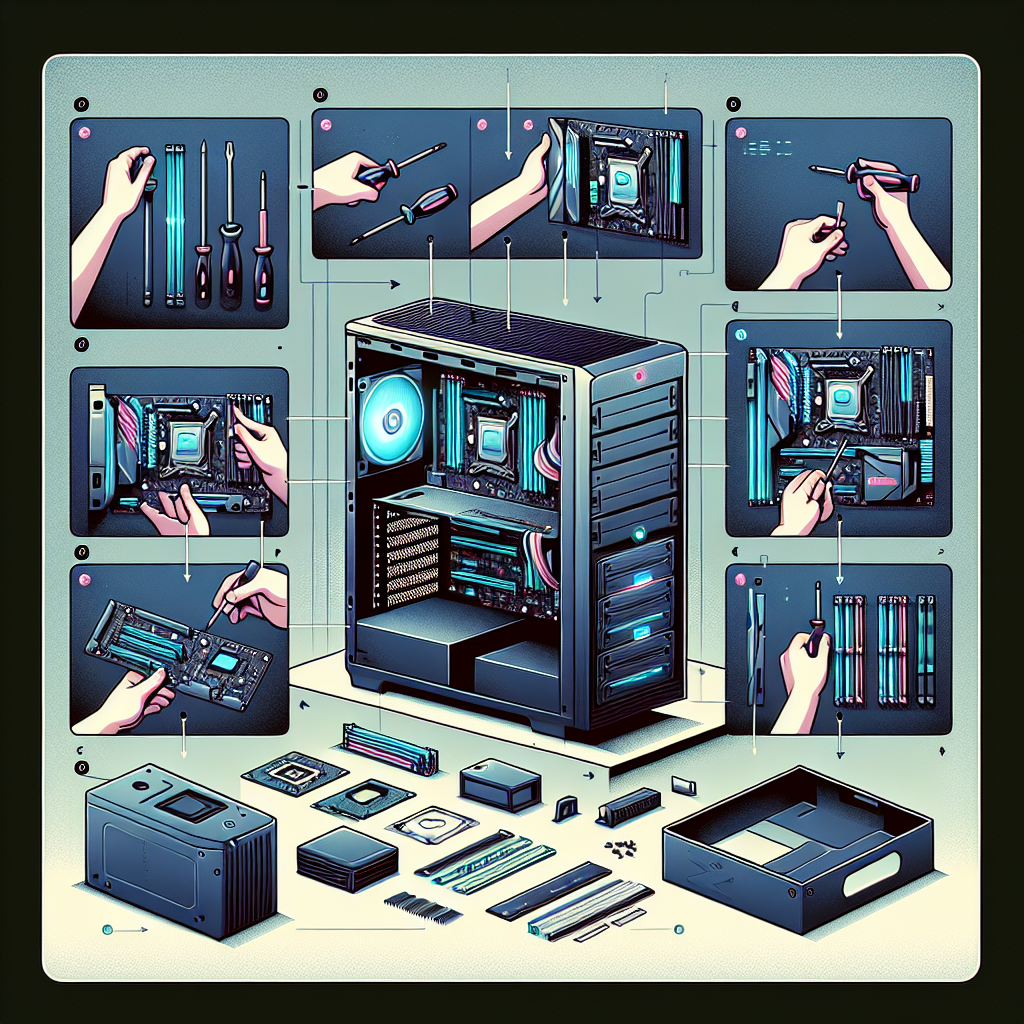
Step 3: Gather Tools and Prepare Workspace
Before starting your build, gather all necessary tools, such as a screwdriver, anti-static wrist strap, and cable ties. Ensure your workspace is clean and well-lit to avoid static electricity and accidental damage to components.
Step 4: Assemble Your PC
4.1. Install the CPU
Open the CPU socket on the motherboard and align the CPU correctly. Gently place it in the socket and secure it with the locking mechanism.
4.2. Attach the CPU Cooler
Apply thermal paste (if not pre-applied) on the CPU and attach the cooler securely. Ensure it’s properly connected to avoid overheating.
4.3. Install RAM
Align the RAM sticks with the slots on the motherboard and press them in firmly until they click into place.
4.4. Mount the Motherboard
Place the motherboard in the case and secure it with screws. Ensure that all standoffs are correctly aligned with the screw holes.
4.5. Install the GPU
Insert the GPU into the appropriate PCIe slot on the motherboard. Secure it with screws and ensure it’s seated properly.
4.6. Install the Storage
Mount your SSD in its designated slot or bracket and connect it to the motherboard using the SATA cable.
4.7. Connect the Power Supply
Place the PSU in its designated spot in the case. Connect the main power cables to the motherboard, CPU, GPU, and storage.
4.8. Cable Management
Organize and secure all cables using cable ties. Good cable management ensures better airflow and a neat appearance.
Step 5: Power Up and Install Software
Once everything is assembled, double-check all connections and power up your machine. Enter the BIOS to ensure your components are recognized. Install your operating system and necessary drivers. Configure your system settings, and you’re ready to start gaming.
Conclusion
Building a budget gaming PC is a cost-effective way to enjoy high-quality gaming. By carefully selecting your components and following the assembly steps, you can create a powerful system tailored to your needs. Happy gaming!